Showing posts with label Free patterns. Show all posts

Saturday, September 30, 2017

A Free Felt Angel Christmas Ornament Tutorial


I have had so much fun stitching up decorations for Christmas this year, It gives me so much joy! So when Maria from inLovewithBeauty announced she's waiting for something new to me, I knew exactly what I was planning to make – an angel Christmas ornament!

So here’s some instructions to hand sew this lovely little angel 


In this tutorial, you'll learn how to turn the illustration into a real life softie. When finished, it will be around 6 inches (15 cm) tall. It makes a great gift for kids or any Angel lover. Let's get started!


YOU WILL NEED

- a pieces of felt in your choice of colours;
- a printed copy of the included ‘felt Angel ’ pattern;
- cotton embroidery thread in your choice of coordinating or contrasting colour;
- an embroidery needle;
- wadding or stuffing;
- sewing pins;
- scissors.


STITCH GUIDE / WHICH STITCH?

Learn some basic embroidery stitches. The blanket stitch is basically a series of interwoven loops, this stitch takes a little practice but is wonderful for finishing around curves, it will not however stop your fabric from fraying so I wouldn’t use this on anything other than fleece, felt and other nonwoven fabrics. This is not as hard as it seems, if the words confuse you look at the pictures closely or visa versa. If you still don’t think you understand I encourage you to grab a scrap some thread and a needle and just try it, chances are you’ll get it in no time. If hyperactive 8 year olds can do I know you can too!

The Backstitch creates the appearance of a solid line. Uses: for the eyes and mouth

The blanket stitch is important to attach two pieces of  felt together while maintaining an attractive appearance on both front and back.

In this tutorial, you'll learn how to turn the illustration into a real life softie. When finished, it will be around 15 cm (6 inches) tall. It makes a great gift for kids or any Angel lover. 


LET´S GET STARTED!

1. Cut out your printed Angel pattern following the black outline (paper PATTERN). Pin the Angel pattern in place and cut out the pattern pieces directly on the line. Remove your pattern (and save for later).


2. Stitch a Angel wings ,eye, mouth and Heart 


(you can use felt eyes as an alternative to other eye-making methods).

Backstitch a Cheeks to the Face. Backstitch a Face to the Hair, and finish stitching about 4 centimetres before you meet up with where you began (follow your guides).


3. Thread your needle with two strands of embroidery cotton and secure the ends with a knot. Stitch around the outside of your Angel hair using the following guidelines. Depending on the length of your thread, you will probably need to re-thread your needle with more embroidery cotton, more than once. Finish stitching where you meet up with where you began.


4. Thread again your needle with two strands of embroidery cotton and secure the ends with a knot. Now stitch around the outside of your Angel body using the following guidelines. Stop stitching about three centimeters before you meet up with where you began. Don’t finish off your stitch though, and make sure you leave the thread where it is, so you can finish off the stitching after you add the stuffing.

5. Carefully and gently manoeuvre small pieces of stuffing inside the Angel body. A chop stick or knitting needle is a great tool for this! Add little pieces at a time until the Angel body is average stuffed.

6. Pick up your needle and thread again and continue to stitch the Angel body closed, making sure you secure the stitching with a couple of extra stitches at the end.

7. Move the body between Angel hair and head, close it (attach body to hair) with couple stitches.


8. Finally stitch a Angel wings to the hair (with couple stitches).


Feel free to pop by the STORE to view the full range of DIYStuffies PDF patterns. Or head to my FACEBOOK page to share your creations. Feel free to follow along.

Thanks for following along. Happy stitching, Monika x

This post was written by Monika Teller

Wednesday, June 7, 2017

The Pocket Pack Tissue / From sumoftheirstories.com

I have a lot of toy patterns, but here is something new and inspiring from #sumoftheirstories :

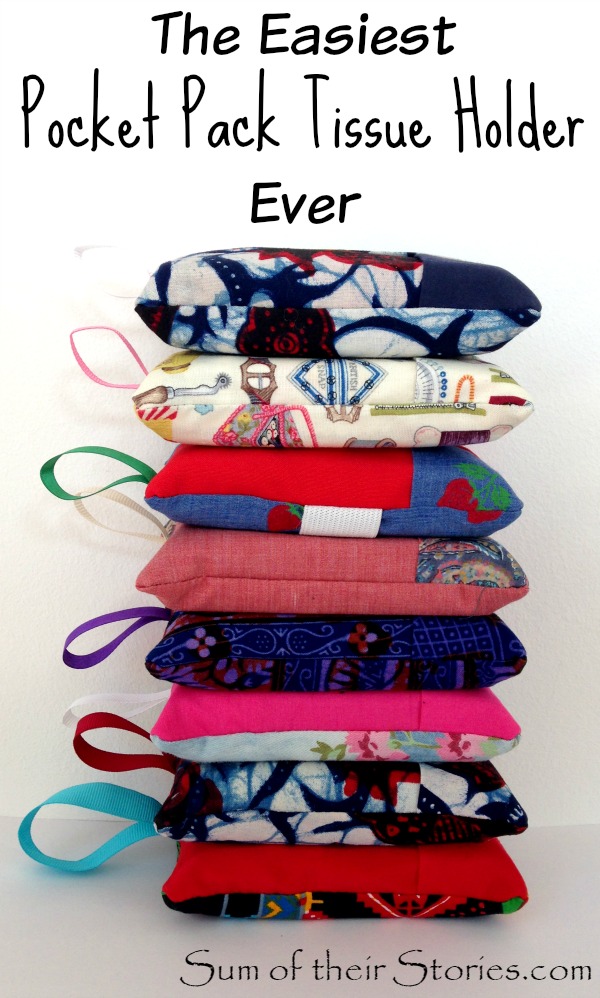
The Easiest Pocket Pack Tissue Holder Ever
www.sumoftheirstories.com

I can't believe I didn't already know this - how to make the easiest pocket tissue holder ever!
easy to make pocket pack tissue holder

Sewing My Stash - Part 1

I feel like I must have been living under a rock or something, I'm not quite sure how this has happened. I make things. I've been making little bits and pieces my whole life so how is it possible I've never seen this way of making super cute, super easy fabric holders for your pocket pack of tissues until now? How? How?

This all started a few weeks ago when I finally got round to sorting out my fabric stash. I tend to keep it all - big bits, little bits, teeny tiny left overs from all the sewing I've ever done, charity shop bargains that I think I might make into something else one day. Plus I inherited quite a bit from my mum and my nan who both sewed a lot.
I got it all out, thinking I would be ruthless, get rid of all the bits too small to actually do anything with.
It looked like this:
Oh dear, oh dear, oh dear! Can you tell where I was sitting as I got it all out around me!

The trouble with fabric is that even tiny bits COULD be made into something. To throw it away just seems so wrong. So instead I decided I'm going to "Sew my Stash" and started looking on pinterest for quick ideas to use these tiny bits. I found a cute folded coaster idea and from there a folded fabric tissue pouch. All I could find at the time was one of those long pins with simple step by step but it didn't lead anywhere, so I played about a bit and took some photos as I went to show you how, just in case this is something you've not seen before either.
I made LOADS, I'm not kidding, if you know me in real life there is a good chance you will get one of these as part of your next birthday present! The first one (photographed for the tutorial) I added a length of elastic on the back for a little bottle of hand sanitiser. That is completely optional, just miss it out if you don't want that.

So, to make a super easy Pocket Pack Tissue Pouch you will need:
easiest pocket pack tissue holder
Fabric:
3 pieces 6" x 4"
2 pieces 4" x 4"

Optional
A length of ribbon, approx 5" ish
A length of elastic, this only has to be 4". Mine in the photo is way longer, I ended up trimming it off.

Fold both 4"x4" bits in half and 2 of the 6"x 4" bits also. Press with the iron.
Now you just layer the pieces up.
Lay the remaining unfolded 6"x4" pieces on the table RIGHT SIDE UP, this is the back of the tissue pouch.
1) If using them, place the elastic and the ribbon, folded in half onto the back
2) to 5) lay the folded fabric pieces on as shown, making sure the folded edge is always to the middle

simple to make pocket pack tissue holder

6) lift the corner of the first piece and tuck the last piece under (that's in the top right corner of these photos) then pin to hold everything in place

easy to make pocket pack tissue holder
7) stitch all the way round leaving a 1/2" seam allowance - you will want to stitch a little straighter than I did!
8) if you are adding a ribbon tag, when you get to it just reverse back over where the ribbon is just to reinforce it, then carry on
9) trim the corners as shown and the seam allowance. You can neaten the raw edge however you like, I used my pinking shears as you can see
10) turn the pouch out through the gap in the middle

Use something pointy to poke the corners into shape, a chop stick or similar, do not jam your fabric scissors into the corner too hard or your might do this:
Ops!
I also discovered that some tissue packs open at the end now, rather than in the middle. My seam ripper turned out to be perfect for making a middle opening to make the tissues work with the pouches I had just made.
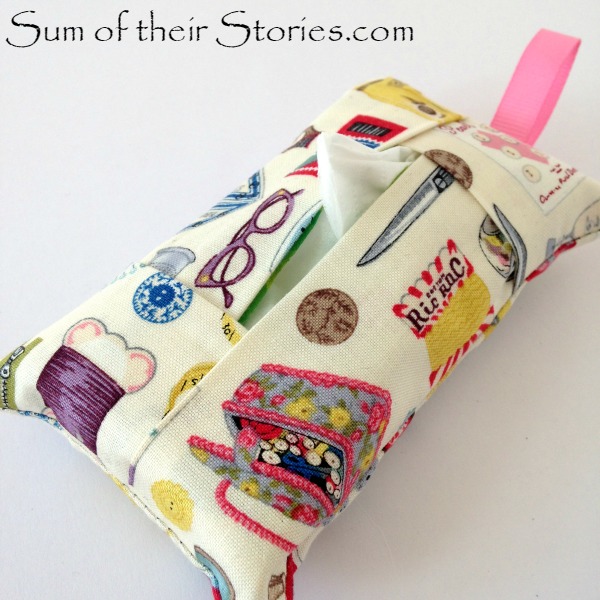
Squeeze the tissues into the pouch and that's it - done!
easy to make pocket pack tissue holder
I am a little disappointed that I wasn't more careful thinking about the placement of the strawberries, they are all rather hidden on the front. The back is all strawberry fabric though so it's not too awful.
The easiest pocket pack tissue pouch ever
This is just a small selection of the ones I made, you can see I didn't measure the ribbons and I only actually put the elastic on the first one. I am keeping my eyes open for prettier elastic for the next batch.
easy to make pocket pack tissue holder
You can use 5 different fabric, just 2 or 3 complimentary ones or all the same, whatever you have that needs using up.
easy to make pocket pack tissue holder
I've made tissue pack holders before, using the more traditional method.
I made this one for my mum many, many years ago, she always had it with her in her handbag. I can't bring myself to use it so I keep it in a little box of her things.
I am loving this new method (new to me anyway) so much more. It seems quicker and the raw edges inside are less visible as they are tucked in further.
easy to make pocket pack tissue holder
I don't pretend for a second to have invented this, but just in case you, like me, have missed out on this before, maybe you will enjoy making these as much as I did.
I'll have some more "Sewing my Stash" Projects to share in the next few weeks.
Than You Julie!


Thursday, June 2, 2016

3 FREE Spring Sewing Tutorials

Pin Cushion Thread Catcher


Use your prettiest floral fabrics and you’re all set for spring sewing!  Colors, colors…love it! 

With love,

Tuesday, May 10, 2016

The DIY jewelry from JOY EVER AFTER

joy ever after
I hope you enjoy the DIY jewelry I threw together this weekend!
Supplies // Felt colors of your choice, fish hook earrings, and small metal loops.
Tools // Needle & thread, scissors, needle nose pliers, and paper for pattern (optional).
First, cut out the shapes you want from paper to use as a pattern before cutting the felt.
Next, cut out the felt in different colors and sizes.
Here we have the most complicated step, tying the metal loop to the layered felt.
Lastly you attach the fish hooks to the metal loops. Super simple! Now I have a few accessories to dress up a casual outfit. Please let me know if you have any questions and be sure to let me know if you make a pair of your own!

Thursday, February 11, 2016

Pillow covers for my home

Flower decorative pillow cover
My quick and easy Pillow Covers that literally takes minutes to complete :)

All you need is a fabric, scissors, and a sewing machine or needle and thread.

INSTRUCTIONS:
1. Measure how big you need to cut your fabric.
2. Cut your fabric front and back pieces.
3. Pin the pieces together (right side on the inside)
4. Sew using a sewing machine all the way around, making sure to leave an opening about 20 centimeters.
5. Flip your pillow cover inside out and insert your pillow! 
6. Now continue to stitch until the The Pillow close.

Once you get the hang of this process, you’ll want to cover every pillow in your house! :)

With pillow cover have new Ironing board cover too :)

So, I made more Pillow Covers, some of them are my home and other for birthday gift to my brother (Marilyn Monroe Pillows). 


With love,
Monika