Showing posts with label How to sew. Show all posts

Thursday, June 8, 2017

Fun with pants and Elephant (s) :)

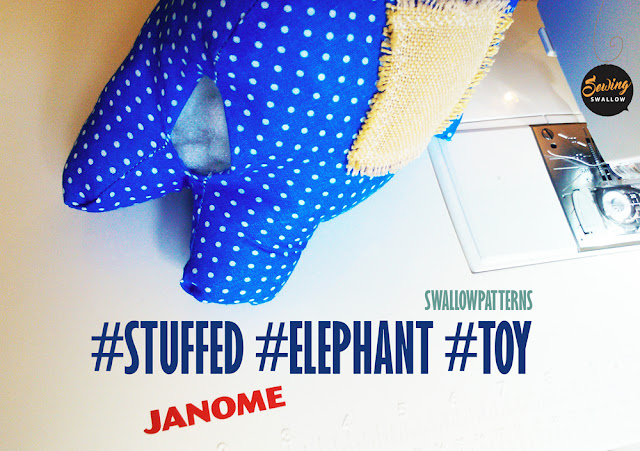
You can have this Elephant pattern from Etsy. Simple and easy to make Elephant plushie pattern is great for beginners to advanced sewers. 


This finished Flannel Elephant will stand approx. 6 inches tall (16 cm). Use it like a soft toy or pillow. 
It is...
* Simple and fun!
* Make it in many colors!
* This project makes up very quickly, and you can make it any size by decreasing or enlarging the pattern.


... and pants can You have from OTTOBRE Summer 2016 HERE from Etsy or your local shop.

Tuesday, October 4, 2016

Sewing Machine Presser Foot Guide- for beginners. Did you know?


Which sewing feet should you use and when/where?

The sewing machine presser foot is the small attachment that usually smoothies and flattens the fabric as it is fed through the machine and stitched. There are lots of different presser feet for all kinds of sewing jobs. You will probably never need to use them all.


your sewing machine's presser feet
On most modern machines you can change the foot with a simple lever which allows the presser feet to be easily released and changed. The presser foot attaches to the presser foot holder which is held onto the presser bar, usually with a small screw. You shouldn't need to remove the presser foot holder except for maintenance.

Choosing the correct sewing machine presser foot for the job!
Choosing the correct presser foot for your machine can make all the difference to a project, and it’s good to know which kind are available and their uses. Presser feet work in combination with a specific stitch or range of stitches, or manipulate the fabric to allow you to sew a specific technique.

Standard foot (A)
Every machine will come with a standard foot (also know as a zigzag foot). This foot has a pair of matching 'toes' either side of the needle. The standard foot will mainly be used for straight and zigzag stitching and some decorative stitches, depending on your brand of machine.


Regular zip foot (E)

This comes as standard with most machines and has openings on both sides, which allow you to sew near to a zip on each side. You must alter the position of the needle depending on which side of the foot you want to use. It can also be used to sew piping.


Quarter-inch seam foot (O)

This foot is indispensable to most quilters and dressmakers as it allows you to sew a perfect quarter-inch seam every time using the seam guide line duo along the edge of your fabric.


Walkingfoot

By using teeth similar to the feed dogs (found at the base of the machine that feed the fabric), this foot can also move the fabric from the top, making it great for thick, heavy fabric, or fabric that tends to stick. It’s also a quilter’s best friend!

Automatic buttonhole foot

Used in combination with your buttonholes stitches, this clever foot measures the button, which is inserted into the back section of the foot to create perfect buttonholes.


Darning, free machine or open toe foot

This is used mostly for free-machine sewing where the needles is used to create patterns and texture on fabric. It can also be used to top-stitch quilted projects. The feed dogs must be lowered to allow the fabric to move freely.

Piping or cording foot

With open grooves on the underside, the piping or cording is held in position and passes through the foot in a straight line, creating even stitching.

Satin foot (F)

Usually clear to aid visibility, and sometimes with an open toe, this foot is used for decorative and satin stitching as the foot allows a build up of stitches to be sewn on the fabric.
Teflon foot
Made using non-stick Teflon, to allow the foot to glide easily over laminated, vinyls, leather and suede, without the friction caused by a standard foot.


Blind Hem Foot (G)


Blind hemming can sometimes be a little bit tricky so the blind hem foot goes some way to helping improve this technique. The foot has a metal guide in the center and three grooves on the underside. During blind hemming, the fold of the fabric fits snugly against the fuide in the foot for accuracy wile the groove underneath help to prevent unnecessary slipping. The needle swings over the metal guide creating slack in the upper tension so that the pick of the stitch is almost invisible.


Pintucking Foot (T)
The pintucking foot is used with a 2mm twin needle to create multiple rows of pintucks. The grooves on the underside of the foot make it easy to stitch several rows parallel and evenly spaced from each other.


Ribbon / Sequin Foot (G)

As with beads and pearls it is now so much easier to attach ribbons and even sequins with the help of our special ribbon/sequin foot. This foot is designed with guides through which ribbon or strung sequins can be inserted and it will allow them to feed through evenly as you sew. Besides affixing the ribbon, a wide ladder stitch can be used with narrow ribbon to make an easy and functional drawstring.


AND MORE...... 


Top Tip!
Our top tip when you change your sewing machine's presser feet, is to put the foot you are taking off immediately back where it belongs. There's nothing quite so frustrating as wanting to sew up a zip and not being able to find the right foot in your sewing box!

Which sewing machine foot could you not live without?

Read about:
- WHAT DO YOU USE FOR TOY STUFFING?
- TIPS FOR STUFFING

Read more from: http://www.lovesewingmag.co.uk/
Visit my patterns shop: DIYSTUFFIES

Thursday, September 15, 2016

What am I inspired by?

What am I inspired by? I’m inspired by nature, wild things, and green growing things. And most of all I’m inspired by my little Georg. Almost everything I make is in some way rooted in my Georg. Many of my original creations have found their home here with my little boy and are well loved and played with.

All of the toys I make are created to be played with by children. In fact, my toys are played with by children.

Take one step into my home and you’ll find my toys and creations everywhere. Each toy is created for my sewing patterns and then passed straight from my hands, lovingly into the arms of my Georg. So I guess you could say that all of these toys are child tested and approved!

So, what would you like to sew today?

Thursday, July 28, 2016

Stitches- Running stitch

Running stitch
A running stitch is the stitch most people know - and a basting stitch is a longer version of a running stitch. A running stitch can be used for most anything - basting stitches are really only used to keep two pieces of fabric together for fitting, applique, or machine sewing when pins would get in the way!

You'll want to start by threading your needle and knotting the end(s) of the thread.

For the running stitch: bring your needle up through the fabric from the back (or wrong side, whichever lingo you prefer) until the knot hits the fabric. At this point, you'll simply make a stitch to the left or right of where the thread came through. Then bring the thread back up and start all over again! (You can either do the standard up and down, or push the needle through and make several stitches at once.) When you come to the end, simply knot on the back side of your work.


Wednesday, July 20, 2016

Good night bunnies //

I'm busy working on a new sewing pattern and tutorial explaining how to make this little new Bunny toy. It will (hopefully) be available for you to download very soon. So excited :)
New little bunny

Thursday, July 7, 2016

Tips for stuffing

 Tips for stuffing
Tips for stuffing
You would think that stuffing a plush toy would be the easiest part, but if you rush and push the toy stuffing in as quickly as you can, you will create lumps.

Everyone wants their toys to be soft, but if there’s too much stuffing in the toy it can get quite hard.

So, take time for stuffing and will create beautifully finished toys.

  1. Stuff your plush toy gently. Carefully and gently move small pieces of stuffing inside the soft toy. Get a small handful of stuffing, hold it lightly and if necessary pull the fibers apart with your fingers before you put it into the toy.
  2. Use a good stuffing material. I like polyester toy fill. Its light weight, cheap and easy to work with. Make sure you use the right quantity of filling material, as using too much will stretch the fabric creating a misshaped project and you’ll see the stuffing through the stitches. Read more from my blog post about what do you use for toy stuffing!
  3. Don’t overstuff you soft toy.  If you overstuff, the fur fabric will stretch too far and you finally you have one big ball Toy. But using too little will make the toy too floppy. So, take time to stuff.
  4. Take time and take it slow. Do it slowly, using small amounts of stuffing. If you try to rush you will create a lump and you will have to pull it out and start over. 
  5. Insert little stuffing at a time. 
  6. Stuffing instruments. Knitting needle, Paintbrush handle, Turning tool, Hemostats- anything with a blunt point. I love Chinese chopsticks and my own fingers :)

 Stuffedanimal Elephant pattern
Stuffedanimal Elephant sewing pattern
So, let me know what do you use for stuffing- FiberFill and your own fingers like me? ;)

Thursday, June 30, 2016

What do you use for toy stuffing?

I’ve written about how to stuff your new soft Toy, but now is time to talk about the most important of all: what do you use for toy stuffing?
SwallowPatterns is Stuffing

So, I like to use Polyester Fiberfill (PolyFill) Toy stuffing (ex. here: Baby bunny). It is now the most used toy stuffing and its easy to work with, its great!
Extremely light weight, it’s washable, holds it’s shape and is hypo-allergenic. It’s also very cheap and available in almost every craft store on the planet. :)

Polyester Fiberfill
PolyFill, Polyester Fiberfill
You can also use more natural stuffing, like:
* Wool- It is natural but this toy stuffing material cannot be machine washed or dried in heat
Wool stuffing

* Corn Fibre toy Fill. It is extremely soft whilst maintaining its shape and resilience. Corn fibre can be used for both soft and firm fills. The more you stuff, the firmer the feel. The fibre also holds a very low flammability rating. Naturally hypoallergenic & Anti-bacterial. Hand Wash - Line Dry
This is best for children’s toys because it is light weight, hypoallergenic and washable. You can get corn fibre fill from Inner Green 
Corn Fibre stuffing
* Bamboo Toy stuffing- it's very silky and soft. Most people that have used it, love it. Bamboo stuffing has the density and feel of cotton, and the hypoallergenic and antibacterial properties of bamboo. 
Bambo Stuffing
There is cheap alternative like old pillows, but these have to be clean!! Please wash the pillow before cutting it open if you want the stuffing clean.


........................................................................................................
So, in the end,  feel free to experiment, and let me know if there’s one I haven’t thought of!

Friday, June 17, 2016

New SUMMER pants from OTTOBRE

Summer is here in Tallinn, and new pants from new OTTOBRE too :) This pattern was so lovely!


You can have your new OTTOBRE Summer 2016 HERE from Etsy or your local shop.


Wednesday, June 8, 2016

2in1- Sewing and cutting table

I cannot explain to you how happy and excited I am to finally share this with ya'll. I have a new sewing table, 180x110x75cm!
I've been sewing off and on for years, but it only really became a weekly thing with me after my little Georg were born.

The new sewing Table woodworking project is ordered from AIKON (http://www.aikon.ee/)
My sewing machine and cutting mat is so comfortable to use now.
I’m glad that I’ve got such a great place to work and that I can show it off to you! What are you doing to get ready for summer? Let me know in the comments!!!!

Thursday, June 2, 2016

3 FREE Spring Sewing Tutorials

Pin Cushion Thread Catcher


Use your prettiest floral fabrics and you’re all set for spring sewing!  Colors, colors…love it! 

With love,

Friday, May 6, 2016

10 REASONS TO BUY HANDMADE TOY SEWING PATTERNS OVER MASS PRODUCED

 10 reasons to sew

Hi! So people ask me- why spend your precious time and money creating something you can buy at the mall for a few bucks? Absolutely right, today we can purchase toys for pennies, almost literally. Here are my personal top ten reasons why to Love sewing and not purchase mass Produced Toys:

1. Sewing softies is fun- start today! 
For most of us, sewing reminds us of afternoons with Mum or Grandma- traditions. But sewing does more than allow us to make some cool stuff- it is something that has brought joy into my life.

2. Sewing soft toys connects you to others.
Granted!  In the past six years I have met so many talented, inspiring, intelligent people through sewing, not to mention through blogging about sewing! Also some of my friends started sewing soft toys with me, and we have now a lot to talk about sewing too.

3. Sewing stimulates the mind. 
There is so much to learn when you start to sew: To read pattern, to understand fabrics, how to use a sewing machine (my little 3 years old Georg loves it!).
4. FREESTYLE!
Just take a flat picture-pattern and turn it into a softie! Use felt, fur or fleece, handstitch or use sewing mashine, use bottoms for eyes or handstitch them.  Freestyle!

5. You can sew Your soft toy any size.
...by decreasing or enlarging the PDF pattern.

4. Sewing can save you money.
You have saved real money by making something yourself. And if you were to cut up a fleece blanket or a pair of worn out pajamas that you already had and make lovies from that you would save even more.
6. Sewing reduces stress.
Being able to sit down and just concentrate on one thing such as sewing forces you to slow down and breathe. No worries about anything else that the ordinary person stresses about everyday. Even if it is only for half an hour, it’s a great way to forget everything else for a brief moment and relieve the stress of everyday life (The Amerikan Institute of Stress)

7. Allergies, Safe baby products
Buttons, batteries, yarn, ribbons, eyes, beads, and plastic parts that could easily be chewed or snapped off. Make your own and You can be sure a stuffed animal's tail is securely sewn on and the seams of the body are reinforced.

8.  It will always come in handy
Whether you find yourself needing to replace a button or repair a rip , all you
need is a good pair of scissors, a strong spool of thread and a trusty machine to become your
own hero.

9. Never compromise on your toy colour or style- make exactly what you want.


10. You can become famous for your creations and for saving the planet at the same time! 


Happy sewing!!!