Wednesday, April 10, 2019
Thursday, September 13, 2018
Wednesday, January 24, 2018
Monday, January 15, 2018
I Love You felt PDF project
I Love You felt PDF Pattern, Valentine Heart ornament, Decoration, Valentine gift with sewing instructions
EUR 1.80 EUR 5.30
Buy Now
You save EUR 4.20 (70%)
Wednesday, November 15, 2017
6 Christmas Sewing Projects
 I feel like I have seen SO many cute Christmas sewing projects recently. There are always so many I want to try, so I’m finally making a list and thought I might as well put it all in one place and share it with the rest of you.
(In case you’re anything like me: I’m finally in the mood to sew Christmas projects during the Christmas season. I have a hard time doing it not-at-Christmas time. It’s kind of like Christmas music – I can’t listen to it until after Thanksgiving.)
Here are a bunch of fun Christmas making ideas -some oldies from years past, and some brand new..
Adorable Felt Toadstool House Christmas Decoration Sewing PATTERN & Instructions, 10cm Tall
Cute Christmas Garland kit/ Christmas tree garland. Pattern.
DIYStuffies
My own little felt penguins, one with christmas hat. Pattern and Instructions
Lovely DIY felt PDF Candy Cane Christmas pattern
Rudolph the reindeer - PDF sewing pattern
Christmas pattern felt Santa Claus and Mrs Claus pattern PDF
Saturday, September 30, 2017
A Free Felt Angel Christmas Ornament Tutorial
I have had so much fun stitching up decorations for Christmas this year, It gives me so much joy! So when Maria from inLovewithBeauty announced she's waiting for something new to me, I knew exactly what I was planning to make – an angel Christmas ornament!
So here’s some instructions to hand sew this lovely little angel
YOU WILL NEED
- a pieces of felt in your choice of colours;
- a printed copy of the included ‘felt Angel ’ pattern;
- cotton embroidery thread in your choice of coordinating or contrasting colour;
- an embroidery needle;
- wadding or stuffing;
- sewing pins;
- scissors.
STITCH GUIDE / WHICH STITCH?
Learn some basic embroidery stitches. The blanket stitch is basically a series of interwoven loops, this stitch takes a little practice but is wonderful for finishing around curves, it will not however stop your fabric from fraying so I wouldn’t use this on anything other than fleece, felt and other nonwoven fabrics. This is not as hard as it seems, if the words confuse you look at the pictures closely or visa versa. If you still don’t think you understand I encourage you to grab a scrap some thread and a needle and just try it, chances are you’ll get it in no time. If hyperactive 8 year olds can do I know you can too!
The Backstitch creates the appearance of a solid line. Uses: for the eyes and mouth
The blanket stitch is important to attach two pieces of felt together while maintaining an attractive appearance on both front and back.
In this tutorial, you'll learn how to turn the illustration into a real life softie. When finished, it will be around 15 cm (6 inches) tall. It makes a great gift for kids or any Angel lover.
LET´S GET STARTED!
1. Cut out your printed Angel pattern following the black outline (paper PATTERN). Pin the Angel pattern in place and cut out the pattern pieces directly on the line. Remove your pattern (and save for later).
2. Stitch a Angel wings ,eye, mouth and Heart
(you can use felt eyes as an alternative to other eye-making methods).
Backstitch a Cheeks to the Face. Backstitch a Face to the Hair, and finish stitching about 4 centimetres before you meet up with where you began (follow your guides).
3. Thread your needle with two strands of embroidery cotton and secure the ends with a knot. Stitch around the outside of your Angel hair using the following guidelines. Depending on the length of your thread, you will probably need to re-thread your needle with more embroidery cotton, more than once. Finish stitching where you meet up with where you began.
4. Thread again your needle with two strands of embroidery cotton and secure the ends with a knot. Now stitch around the outside of your Angel body using the following guidelines. Stop stitching about three centimeters before you meet up with where you began. Don’t finish off your stitch though, and make sure you leave the thread where it is, so you can finish off the stitching after you add the stuffing.
5. Carefully and gently manoeuvre small pieces of stuffing inside the Angel body. A chop stick or knitting needle is a great tool for this! Add little pieces at a time until the Angel body is average stuffed.
6. Pick up your needle and thread again and continue to stitch the Angel body closed, making sure you secure the stitching with a couple of extra stitches at the end.
7. Move the body between Angel hair and head, close it (attach body to hair) with couple stitches.
8. Finally stitch a Angel wings to the hair (with couple stitches).
Feel free to pop by the STORE to view the full range of DIYStuffies PDF patterns. Or head to my FACEBOOK page to share your creations. Feel free to follow along.
Thanks for following along. Happy stitching, Monika x
This post was written by Monika Teller
Tuesday, September 26, 2017
Thursday, September 14, 2017
More phants in my livingroom//
More elephants means more love and hope. "Elephant in the room" is an English-language metaphorical idiom for an obvious problem or risk, but we all know that risks and problems are spiritual. So- lets talk about our joys and elephants we really love! :)
MORE ELEPHANTS IN THE ROOM IS BETTER THEN YOU COULD EVER IMAGINE!
WoodOnWalls can make you happy with one Nursery Decor Wall Art or Baby Shower Gift if you will ever need it.
MORE ELEPHANTS IN THE ROOM IS BETTER THEN YOU COULD EVER IMAGINE!
 |
| Elephant Happy Sewing Pattern with instructions, PDF Softie |
WoodOnWalls can make you happy with one Nursery Decor Wall Art or Baby Shower Gift if you will ever need it.
 |
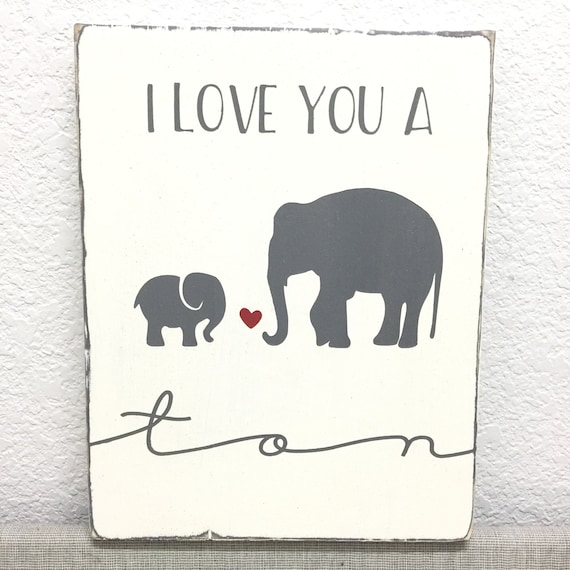
| I Love You A Ton Sign | Nursery Wood Sign | Rustic Nursery | Woodland | Sarfari | Nursery Decor Wall Art | Baby Shower Gift |
Monika Teller / DIYstuffies.etsy.com
..............................................................................................
Monday, June 19, 2017
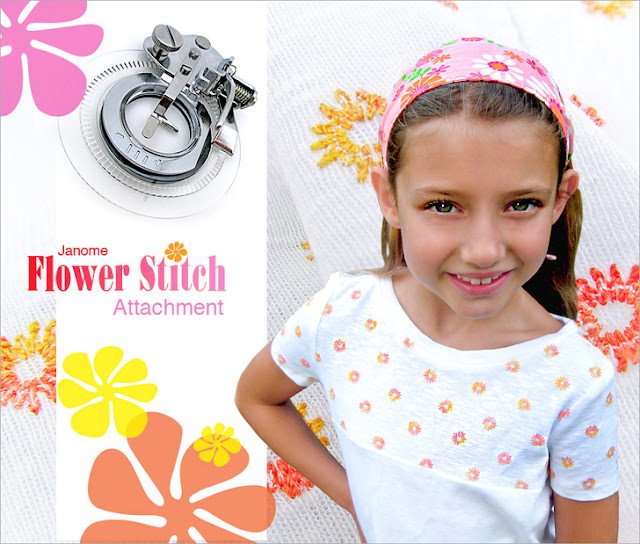
Janome Flower Stitch Attachment. Did you know?
The Janome Flower Stitch Attachment is the flower girl of the sewing accessory world, allowing you to sprinkle pretty posies over any project. The attachment fits Janome low shank sewing machines with a maximum stitch width of 7mm. It is not compatible with machines that include embroidery, have the Janome AcuFeed™ or AcuFeed Flex™ systems, or feature a maximum 9mm stitch width. For more basic sewing machines, it's a fun and easy way to add little decorative stitch touches in pretty thread colors!
The attachment adjusts to give you small, medium, and large options for each recommended stitch pattern. You can even combine patterns to create your own unique designs made up of concentric circles. It can also be used to create eyelets.
It's a lovely effect to add a scattering of color and texture across a garmet or home décor project. Try a variegated thread to increase the impact.


Setting up the machine
- Turn the power switch off.
- Raise the needle and presser foot, then remove the foot holder and standard presser foot.
- Thread the needle and bobbin.
- Place the Flower Stitch Attachment in position. Make sure the Raising Lever sits above the needle clamp.

- Use a screwdriver to tighten both the thumb screw and the needle set screw to prevent them from loosening while the attachment is working.
- Drop the feed dogs.
- Reduce presser foot pressure to 3 and set the thread tension to 1 - 3.
- Select a stitch from the list below.

- Adjust the stitch width to no more than 5mm. As shown below, you should try some test samples to review all the options you can achieve by varying the stitch itself as well as the stitch width.
- Loosen the back screw on the attachment (the screw that sits horizontally) to move the disc right and left between the –and + marks embossed on the disc itself. This movement left and right determines the size of the flower. When set to your chosen position, re-tighten the screw.

Start stitching
- As with most decorative stitching, a stabilizer is recommended behind your project to keep both the fabric and the stitches smooth. With the Flower Stitch Attachment, because it is actually turning the fabric, an iron-on stabilizer is recommended for fewer issues with shifting.
- Place a dot on your fabric where you wish a flower to be stitched. The flowers stitch in a circle from this starting point, which means the dot is the outer ring of the stitch pattern not the inside of the circle. Keep this in mind if you are precisely centering your flowers rather than randomly sprinkling them.
- Place your fabric under the attachment, position the area to be stitched within the center of the disc.
- Lower the presser foot and turn on the power.

- DO NOT back stitch or use a locking stitch, This is important because the Flower Stitch Attachment moves forward with every needle penetration; you risk damaging the attachment, breaking needles, or marring the needle plate if you attempt a locking stitch or back stitch.
- Instead, hold the needle thread lightly with one hand, then raise and lower the needle to pick up the bobbin thread. Sew just a couple stitches to lock the threads. Then, cut away the excess threads. This is similar to how you might start a machine embroidery design.

- Continue sewing at a slow to medium speed to create a flower. This flower was created with a Tricot (3-step zig zag) stitch.
- Changing the lever at the front of the disc from the - at the left to the + at the right changes the shape and size of flower.
- The lever in left position is the the small flower.

- The lever in center position is the medium flower.
- The lever in right position is the large flower.

- When you finish sewing, remember you do NOT lock or back stitch. Instead, simply raise the needle to its highest position and raise the presser foot. Cut the threads, leaving long tails.
- When done with all your flowers, pull each bobbin thread to bring the needle thread through to the wrong side of the fabric, then knot the two thread tails together to secure.
Create a stitch sampler
- To familiarize yourself with the Flower Stitch Attachment and try out all the options, we suggest creating small stitch samples.
- Cut 6” squares of a plain cotton and fuse stabilizer to the wrong side.
- Use a permanent marker to place three dots as your starting points.
- Make a sample of each suggested stitch, changing the position of the disc for each dot. Then write down the stitch number and settings used for future reference.
Subscribe to:
Comments (Atom)


