Monday, February 29, 2016

Bunny-bunny-bunny / New pattern

Happy Easter everyone! 
Easter and my new Bunny plush toy sewing pattern :) Easy to sew, fun to play.
My little Georg loves soft toys, and he loves my sewingmashine too.
So, you will find this sewing pattern with instructions here:

Soft toys make us happy :)
With love,
Mox

Sunday, February 28, 2016

Monday, February 15, 2016

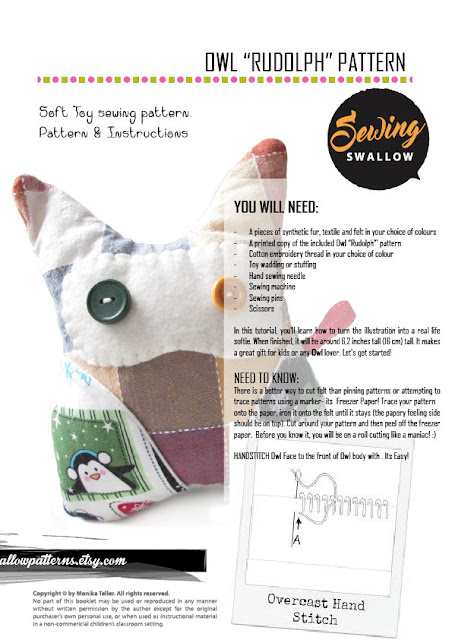
For OWL lovers- Stuffed Owl sewing pattern

 Stuffed Owl sewing pattern
 Stuffed Owl sewing pattern

Insightful, wise, protective, mystical- so so soft and cute :) Handstitch his felt face, use warm textiles and your children will enjoy opening the wings-pockets
 Stuffed Owl sewing pattern
 Stuffed Owl sewing pattern

Start sewing STUFFED OWL and your finished Owl Rudolph will stand approx. 6,2 inches tall (16 cm). Make it any size and read from my blog post about what do you use for toy stuffing!

What to use for toy stuffing

UNIQUE 👶 TOYS FOR KIDS | ✂️ PATTERNS FOR MOMS | ❤️ MADE WITH LOVE | 
 | 📧 monika.teller [!at] gmail.com / SWALLOWPatterns.etsy.com
♡ ♡ ♡ ♡ ♡ ♡ ♡ ♡ ♡ ♡ ♡ ♡ ♡ ♡ ♡ ♡ ♡ ♡ ♡ ♡ ♡ ♡ ♡ ♡

Thursday, February 11, 2016

Pillow covers for my home

Flower decorative pillow cover
My quick and easy Pillow Covers that literally takes minutes to complete :)

All you need is a fabric, scissors, and a sewing machine or needle and thread.

INSTRUCTIONS:
1. Measure how big you need to cut your fabric.
2. Cut your fabric front and back pieces.
3. Pin the pieces together (right side on the inside)
4. Sew using a sewing machine all the way around, making sure to leave an opening about 20 centimeters.
5. Flip your pillow cover inside out and insert your pillow! 
6. Now continue to stitch until the The Pillow close.

Once you get the hang of this process, you’ll want to cover every pillow in your house! :)

With pillow cover have new Ironing board cover too :)

So, I made more Pillow Covers, some of them are my home and other for birthday gift to my brother (Marilyn Monroe Pillows). 


With love,
Monika

Wednesday, February 10, 2016

Bow Tie Tutorial

Bow Tie Tutorial
Bow Tie Tutorial
Do You have something to wear for, Birthday or Valentine's party? Adjust the bow pattern smaller or larger depending on the size you need. Lets start :):


3 pieces – the Bow tie, the knot in the middle, and (rubber) band that goes around the neck.

1 x Bow Tie: 12.5cm x 37.5cm
1 x Knot: 9cm x 7.5cm
2 x Band: 54cm x 4cm (Cut this piece to a point at one end) OR THE RUBBER BAND

For Children:
1 x Bow Tie: 7,5 inch  x 10.5 inch
1 x Knot: 2,5 inch x 2 inch
2 x Band: 18 inch x 2inch (Cut this piece to a point at one end) OR THE RUBBER BAND


TUTORIAL –BOW TIE
1. Pin the bow pieces in place.

2. Cut out your Bow tie pattern pieces.

3. Next, fold the bow fabric in half (longways) right sides together and sew a seam along the edge.

4. Flip the fabric right side out, and move the seam to the middle
5. Fold the bow fabric in half again, seam side out, and sew another seam along the edge
6. Flip around again, so the seam is on the inside.
7. KNOT. Take the fabric, knot piece,  and sew right sides together

8. Pick up your needle, thread it with two strands of embroidery cotton and (Ladder) stitch both knot sides ends until the knot is close.

9. Adjust the knot around the bow tie and hand stitch to secure.


I like to use an elastic band for a quick, fun, and easy fit. :)
Lets sew!
Today! :)
Monika


Saturday, February 6, 2016

New Etsy Banner & Logo for Siblik/

Graphic design is my passion, just let me know what you need and I can help with it.
So, work with Siblik // siblik.etsy.com // was great, we had idea and here is result :)

Children room Wall Art

This wall art idea came to me a few months ago and I was so excited to make it for my little boy.
 I'm really happy how the other turned out and my little boy loves it. It's colorful and sweet.