Monday, June 19, 2017

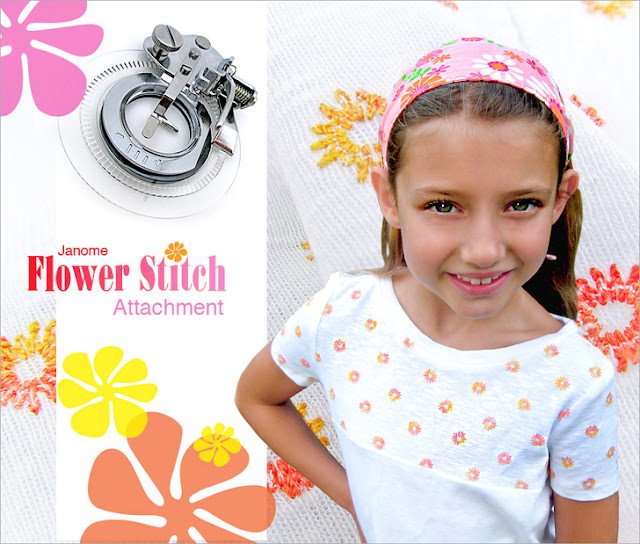
Janome Flower Stitch Attachment. Did you know?


The Janome Flower Stitch Attachment is the flower girl of the sewing accessory world, allowing you to sprinkle pretty posies over any project. The attachment fits Janome low shank sewing machines with a maximum stitch width of 7mm. It is not compatible with machines that include embroidery, have the Janome AcuFeed™ or AcuFeed Flex™ systems, or feature a maximum 9mm stitch width. For more basic sewing machines, it's a fun and easy way to add little decorative stitch touches in pretty thread colors! 

The attachment adjusts to give you small, medium, and large options for each recommended stitch pattern. You can even combine patterns to create your own unique designs made up of concentric circles. It can also be used to create eyelets.

It's a lovely effect to add a scattering of color and texture across a garmet or home décor project. Try a variegated thread to increase the impact. 

Or, use the flowers as a background to feature embroidery or appliqué.

Setting up the machine
  1. Turn the power switch off.
  2. Raise the needle and presser foot, then remove the foot holder and standard presser foot. 
  3. Thread the needle and bobbin.
  4. Place the Flower Stitch Attachment in position. Make sure the Raising Lever sits above the needle clamp.
  5. Use a screwdriver to tighten both the thumb screw and the needle set screw to prevent them from loosening while the attachment is working. 
  6. Drop the feed dogs.
  7. Reduce presser foot pressure to 3 and set the thread tension to 1 - 3.
  8. Select a stitch from the list below. 
  9. Adjust the stitch width to no more than 5mm. As shown below, you should try some test samples to review all the options you can achieve by varying the stitch itself as well as the stitch width. 
  10. Loosen the back screw on the attachment (the screw that sits horizontally) to move the disc right and left between the and + marks embossed on the disc itself. This movement left and right determines the size of the flower. When set to your chosen position, re-tighten the screw. 

Start stitching

  1. As with most decorative stitching, a stabilizer is recommended behind your project to keep both the fabric and the stitches smooth. With the Flower Stitch Attachment, because it is actually turning the fabric, an iron-on stabilizer is recommended for fewer issues with shifting.  
  2. Place a dot on your fabric where you wish a flower to be stitched. The flowers stitch in a circle from this starting point, which means the dot is the outer ring of the stitch pattern not the inside of the circle. Keep this in mind if you are precisely centering your flowers rather than randomly sprinkling them. 
  3. Place your fabric under the attachment, position the area to be stitched within the center of the disc. 
  4. Lower the presser foot and turn on the power. 
  5. DO NOT back stitch or use a locking stitch, This is important because the Flower Stitch Attachment moves forward with every needle penetration; you risk damaging the attachment, breaking needles, or marring the needle plate if you attempt a locking stitch or back stitch. 
  6. Instead, hold the needle thread lightly with one hand, then raise and lower the needle to pick up the bobbin thread. Sew just a couple stitches to lock the threads. Then, cut away the excess threads. This is similar to how you might start a machine embroidery design. 
  7. Continue sewing at a slow to medium speed to create a flower. This flower was created with a Tricot (3-step zig zag) stitch.  
  8. Changing the lever at the front of the disc from the - at the left to the + at the right changes the shape and size of flower.  
  9. The lever in left position is the the small flower.  
  10. The lever in center position is the medium flower.
     
  11. The lever in right position is the large flower.
     
  12. When you finish sewing, remember you do NOT lock or back stitch. Instead, simply raise the needle to its highest position and raise the presser foot. Cut the threads, leaving long tails. 
  13. When done with all your flowers, pull each bobbin thread to bring the needle thread through to the wrong side of the fabric, then knot the two thread tails together to secure. 

Create a stitch sampler

  1. To familiarize yourself with the Flower Stitch Attachment and try out all the options, we suggest creating small stitch samples. 
  2. Cut 6” squares of a plain cotton and fuse stabilizer to the wrong side.
  3. Use a permanent marker to place three dots as your starting points.
  4. Make a sample of each suggested stitch, changing the position of the disc for each dot. Then write down the stitch number and settings used for future reference.

5. Here are our tests - all were done with the stitch width at the maximum 5mm: Sample #1: Zig zag
 

Sample #2: Tricot (3-step zig zag) 

Sample #3: Curve
Sample #4  Shell Tuck

Sample #5 Shell Tuck Variation 

Sample #6  Decorative
Our thanks again to Janome America Education Coordinator, Nancy Fiedler for her help with this tutorial. To stay up-to-date on all the news from Janome, visit their website and/or follow the creativity on their blogPinterestInstagramFacebookTwitter, and YouTube. 

Wednesday, June 14, 2017

Easy soft toy Bunny pattern

Bunny Rabbit toy Pattern


Exactly- She is like Happiness and Love. Your finished Bunny will stand approx. 15 inches tall (38 cm).and you can make it any size. Simple and fun project.... MAKE WITH textile, fleece or synthetic fur. It makes a great gift for kids or any Bunny lover.

1. Mark out and cut your pieces. (Pattern is HERE)
2. Pin the the pieces together.
3. Sew all the way around, ....
4. Maneuver small pieces of stuffing inside the Bunny body.

5. Now, continue to stitch until the The Bunny close.

PATTERN with other instructions is waiting HERE
Have fun!
Monika

Thursday, June 8, 2017

Fun with pants and Elephant (s) :)

You can have this Elephant pattern from EtsySimple and easy to make Elephant plushie pattern is great for beginners to advanced sewers. 


This finished Flannel Elephant will stand approx. 6 inches tall (16 cm). Use it like a soft toy or pillow. 
It is...
* Simple and fun!
* Make it in many colors!
* This project makes up very quickly, and you can make it any size by decreasing or enlarging the pattern.


... and pants can You have from OTTOBRE Summer 2016 HERE from Etsy or your local shop.

Wednesday, June 7, 2017

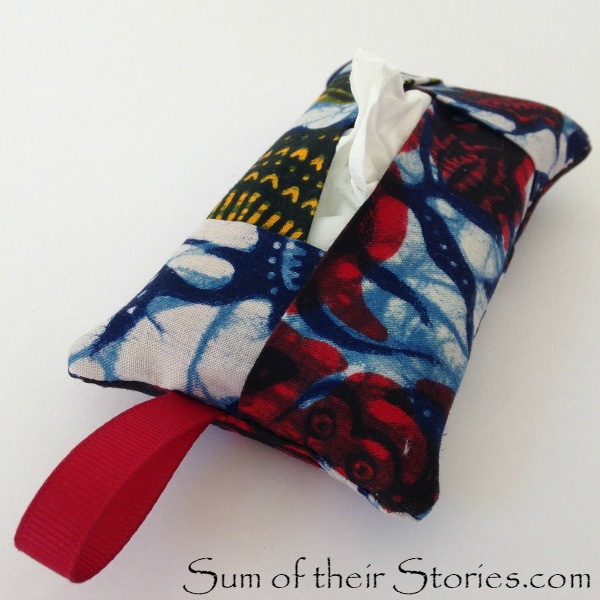
The Pocket Pack Tissue / From sumoftheirstories.com

I have a lot of toy patterns, but here is something new and inspiring from #sumoftheirstories :

The Easiest Pocket Pack Tissue Holder Ever
www.sumoftheirstories.com

I can't believe I didn't already know this - how to make the easiest pocket tissue holder ever!
easy to make pocket pack tissue holder

Sewing My Stash - Part 1

I feel like I must have been living under a rock or something, I'm not quite sure how this has happened. I make things. I've been making little bits and pieces my whole life so how is it possible I've never seen this way of making super cute, super easy fabric holders for your pocket pack of tissues until now? How? How?

This all started a few weeks ago when I finally got round to sorting out my fabric stash. I tend to keep it all - big bits, little bits, teeny tiny left overs from all the sewing I've ever done, charity shop bargains that I think I might make into something else one day. Plus I inherited quite a bit from my mum and my nan who both sewed a lot.
I got it all out, thinking I would be ruthless, get rid of all the bits too small to actually do anything with.
It looked like this:
Oh dear, oh dear, oh dear! Can you tell where I was sitting as I got it all out around me!

The trouble with fabric is that even tiny bits COULD be made into something. To throw it away just seems so wrong. So instead I decided I'm going to "Sew my Stash" and started looking on pinterest for quick ideas to use these tiny bits. I found a cute folded coaster idea and from there a folded fabric tissue pouch. All I could find at the time was one of those long pins with simple step by step but it didn't lead anywhere, so I played about a bit and took some photos as I went to show you how, just in case this is something you've not seen before either.
I made LOADS, I'm not kidding, if you know me in real life there is a good chance you will get one of these as part of your next birthday present! The first one (photographed for the tutorial) I added a length of elastic on the back for a little bottle of hand sanitiser. That is completely optional, just miss it out if you don't want that.

So, to make a super easy Pocket Pack Tissue Pouch you will need:
easiest pocket pack tissue holder
Fabric:
3 pieces 6" x 4"
2 pieces 4" x 4"

Optional
A length of ribbon, approx 5" ish
A length of elastic, this only has to be 4". Mine in the photo is way longer, I ended up trimming it off.

Fold both 4"x4" bits in half and 2 of the 6"x 4" bits also. Press with the iron.
Now you just layer the pieces up.
Lay the remaining unfolded 6"x4" pieces on the table RIGHT SIDE UP, this is the back of the tissue pouch.
1) If using them, place the elastic and the ribbon, folded in half onto the back
2) to 5) lay the folded fabric pieces on as shown, making sure the folded edge is always to the middle

simple to make pocket pack tissue holder

6) lift the corner of the first piece and tuck the last piece under (that's in the top right corner of these photos) then pin to hold everything in place

easy to make pocket pack tissue holder
7) stitch all the way round leaving a 1/2" seam allowance - you will want to stitch a little straighter than I did!
8) if you are adding a ribbon tag, when you get to it just reverse back over where the ribbon is just to reinforce it, then carry on
9) trim the corners as shown and the seam allowance. You can neaten the raw edge however you like, I used my pinking shears as you can see
10) turn the pouch out through the gap in the middle

Use something pointy to poke the corners into shape, a chop stick or similar, do not jam your fabric scissors into the corner too hard or your might do this:
Ops!
I also discovered that some tissue packs open at the end now, rather than in the middle. My seam ripper turned out to be perfect for making a middle opening to make the tissues work with the pouches I had just made.
Squeeze the tissues into the pouch and that's it - done!
easy to make pocket pack tissue holder
I am a little disappointed that I wasn't more careful thinking about the placement of the strawberries, they are all rather hidden on the front. The back is all strawberry fabric though so it's not too awful.
The easiest pocket pack tissue pouch ever
This is just a small selection of the ones I made, you can see I didn't measure the ribbons and I only actually put the elastic on the first one. I am keeping my eyes open for prettier elastic for the next batch.
easy to make pocket pack tissue holder
You can use 5 different fabric, just 2 or 3 complimentary ones or all the same, whatever you have that needs using up.
easy to make pocket pack tissue holder
I've made tissue pack holders before, using the more traditional method.
I made this one for my mum many, many years ago, she always had it with her in her handbag. I can't bring myself to use it so I keep it in a little box of her things.
I am loving this new method (new to me anyway) so much more. It seems quicker and the raw edges inside are less visible as they are tucked in further.
easy to make pocket pack tissue holder
I don't pretend for a second to have invented this, but just in case you, like me, have missed out on this before, maybe you will enjoy making these as much as I did.
I'll have some more "Sewing my Stash" Projects to share in the next few weeks.
Than You Julie!